Using AI and ML Models in applications no longer requires a degree specialized in the field. There are many ready made ML models that you can just download and use. Heck, there are even SaaS solutions for many ML tasks, see e.g. https://www.customvision.ai/. But SaaS solutions typically comes with a pay per use model, that is not always cheap. Sometimes it is more financially viable to run your models on e.g. a Virtual Machine with GPU hardware (most models execute a lot faster with GPUs). That is if you can get it working, without too much trouble. Recently I went through the experience of getting optical character recognition library EasyOCR working on Azure, in this post I will walk you through that experience, from the point of view of a person with no background in AI/ML development. Let’s just say, there is a few pitfalls, that you can waste time on, hopefully after reading this you don’t have to.
Given my rather limited experience in the field, I cannot guarantee that this is the most effective method, and if you are an experienced AI/ML developer, this post probably doesn’t contain much news for you – but feel free to comment or suggest improvements.
Background
The background for my desire to run EasyOCR is that I have a lot of screenshots captured from video games, that I would like to extract the text from, the rest of the details are for another post. Using a SaaS solution is not ideal, as I don’t want to pay to analyze all these images, and ideally I would prefer a solution that could run in near real-time. EasyOCR looked like a promising Open Source project that could do the trick. It uses PyTorch a widely used ML framework, so I was expecting it to work without much trouble. I quickly found an EasyOCR docker container and tested it on my local machine. It worked as promised, not perfect OCR, but a lot better than any other solution that I have tried (hello tesseract). The only problem with the container and running it on my Windows PC is that, it cannot access the GPU, so getting results in near real-time wasn’t looking promising. Doing OCR analysis on my screenshots, took around 3-5 seconds, on an AMD Ryzen 3 3600.
Getting GPU Support Working
My first attempt to speed up EasyOCR was to give it access to my GPU. On Windows while running in a docker container, that used to be a no-go. But recently Windows Subsystem for Linux 2 (WSL2) have actually got support for GPU passthrough to containers. The only problem is that it requires the latest Windows Insider Developer preview. I did install this build on my machine, and got it working with an around 4x speed improvement! However, the preview version of Windows left a few other things broken, so I had to revert back to a stable Windows version. One could argue that I should just avoid using Docker, but I really don’t want to setup Python, PyTorch and the stuff required to get EasyOCR running on my host machine. It is for this exact reason I love container technology, it took me 5-10 minutes to find a container and test it locally, if I had to install all the dependencies on my host machine chances are pretty good that I would still be attempting to get that to work.
Moving to Azure
Instead of spending more time on my local setup, I opted to spin up an Azure VM with a GPU. One thing that wasn’t clear to me before this adventure is how many different GPU offerings that Azure have now.
Generally the VMs with GPUs are categorized into NV, ND, and NC series. The NV is intended to be used for desktop virtualization where a GUI is to be used with the machine, e.g. for CAD or simulation software. Apparently nvidia requires a special license to be used for this type of usage, so they are more expensive to rent, than the NC counterparts. The NC series is just for GPU compute, and the cheapest option, especially the NC promo series of VMs are cheap (in Azure terms, not cheap compared to other GPU hosts like paperspace or linode, but that is another story). The ND-series are for the big boys that need to train large ML models and requires the best hardware the cloud has to offer. Not relevant in my scenario, and apparently also not available on my Azure MSDN subscription, actually the only machines I could get access to was the Standard NC6_Promo (6 vcpus, 56 GiB memory), but good enough I thought.
So I spun up a NC6_Promo VM with Ubuntu 18.04 and went on to install the nvidia driver extension, as required to get the correct GPU drivers installed. When the machine booted I installed Docker and attempted to install the docker-nvidia component needed for GPU passthrough, following this guide. In the end I never got it to work. I didn’t spend a whole lot of time debugging, after I realized that there are ready made VM images from nvidia for the exact purpose of running GPU workloads inside docker containers on Azure.
So I deleted the VM, and created another VM using this guide from nvidia. Nice, I thought, now I’m ready to run my EasyOCR container. But no, it was not that easy. The VM images from nvidia comes in different versions, when you are not experienced in working with ML, little do you know that the version you pick have some pretty big impact on what software versions they come preinstalled with.
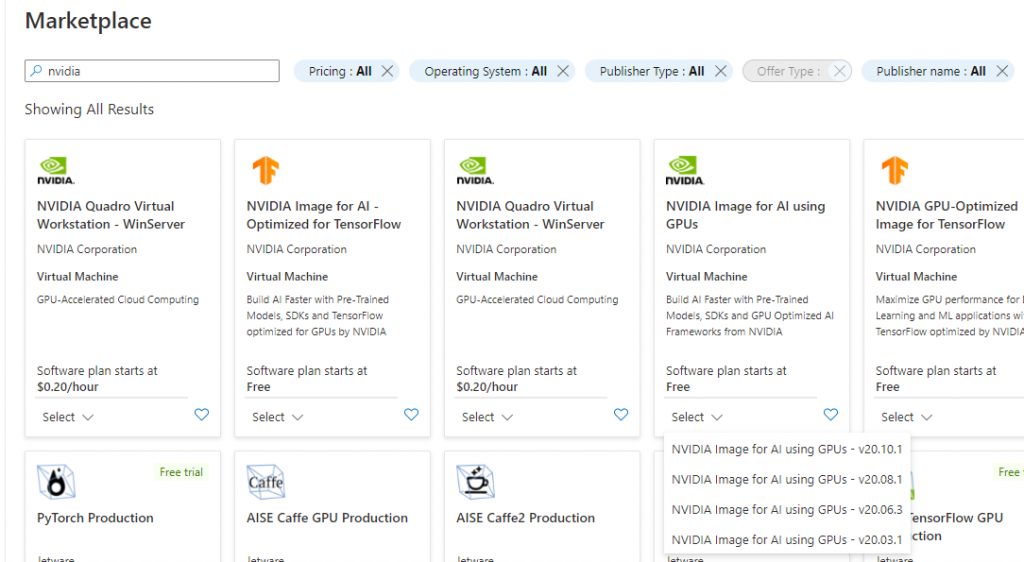
Currently four version are available in the Azure Marketplace to pick from:
- v20.10.1
- v20.08.1
- v20.06.3
- v20.03.1

Normally one would think higher version is better, and just pick the v20.10.1, which is what I did first. But actually the version affects which version of the CUDA library that is installed. Which influence which version of PyTorch that can be used. I wasn’t aware of this, and attempted to reinstall a few times just trying out different version, but getting strange errors when I tried to run the EasyOCR container from deep within the PyTorch library. It was first when I went through the Release Notes for the various images I realized that they had different versions of the Nvidia driver installed, unfortunately the release notes doesn’t state which version of the CUDA library that is installed so you have to cross validate against the CUDA library release notes to figure it out. A bit tedious, so I have mapped it out here:
| Image | Linux x86_64 Driver Version | CUDA Version |
| v20.10.1 | 450.80.02 | CUDA 11.0.3 Update 1 |
| v20.08.1 | ? | ? |
| v20.06.3 | 450.51.05 | CUDA 11.0.2 GA |
| v20.03.1 | 440.64.01 | CUDA 10.2.89 |
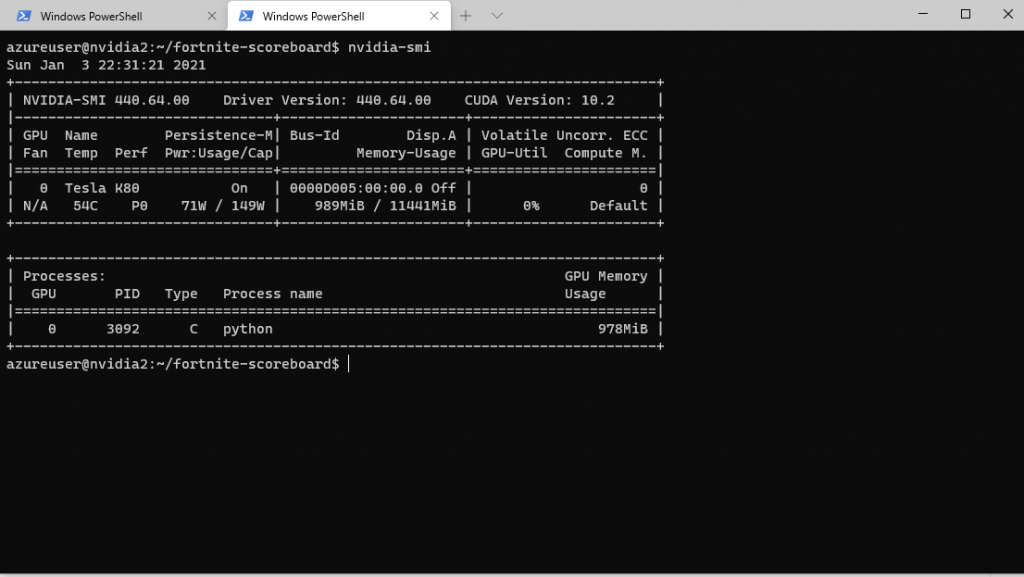
If you have already spun up the machine you can of course also check the GPU and driver information with the command nvidia-smi

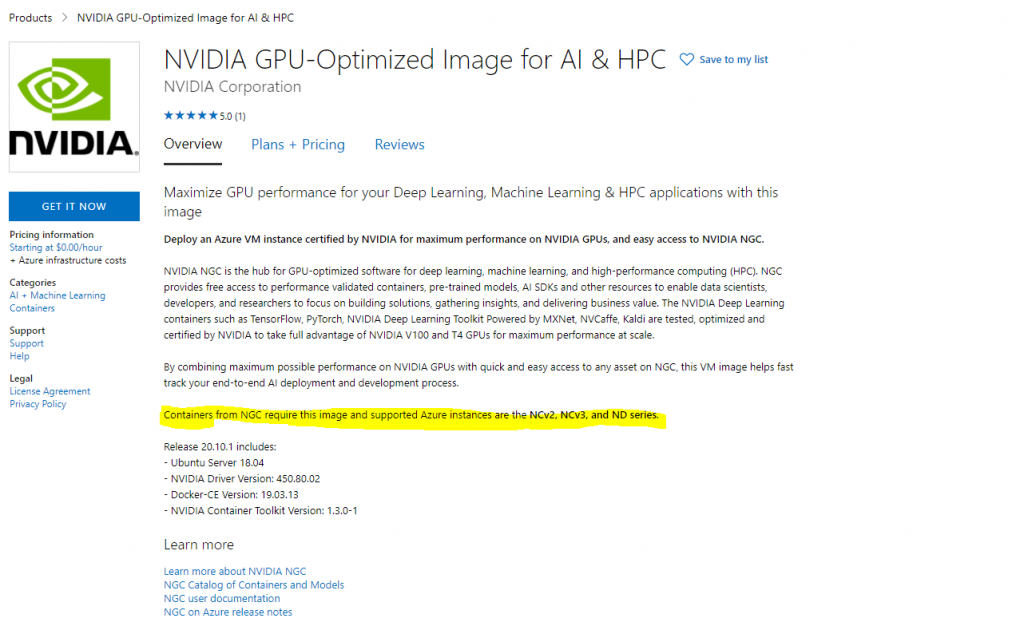
The container image for EasyOCR I had found was using an older version of PyTorch that was compiled against cuda 10.1, and it didn’t want to play along with any of the nvidia images and the drivers they came with as they were all too recent. So in the end the solution was to create my own docker file using another base image. At first I thought I was best to the use the NVIDIA supplied PyTorch images, because the product page for the VM image I used stated it is the only image supported to use the nvidia docker images.

However, that doesn’t mean you can’t use the official PyTorch docker images. Which is what I did, because I couldn’t get the nvidia docker images for PyTorch to work on my NC6-promo VM. Actually the store page also says the VM image is only supposed to work with the more recent v2, v3 and ND series machines, but it worked fine for me.
Summary
In the end the solution for running EasyOCR on a Azure VM with GPU support was to use the v20.03.1 image and a docker file that used the following base image: pytorch/pytorch:1.5.1-cuda10.1-cudnn7-runtime. It is possible that you on some of the VMs with more recent hardware, e.g. the NCv2 or NCv3 can get it to work with the latest version of PyTorch and CUDA 11, but I had no luck with that on my NC6-promo machine.
The docker file in its entirety, can be found here https://github.com/sjkp/fortnite-scoreboard/blob/master/Dockerfile
The container can be run with the following command
docker run -p 8000:8000 --gpus=all sjkp/easyocrThe important parameters is –gpus=all without it the GPU will not be passed through to the container.
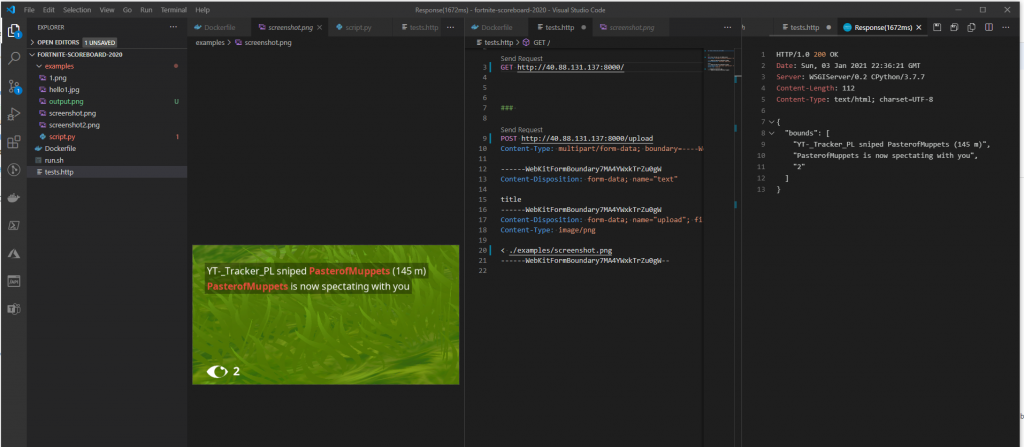
My docker file contains a small python web server written in bottlepy, that contains an endpoint images can be posted to, for OCR scanning.
Here’s how it looks when sending a screenshot from VSCode using the rest-client extension
